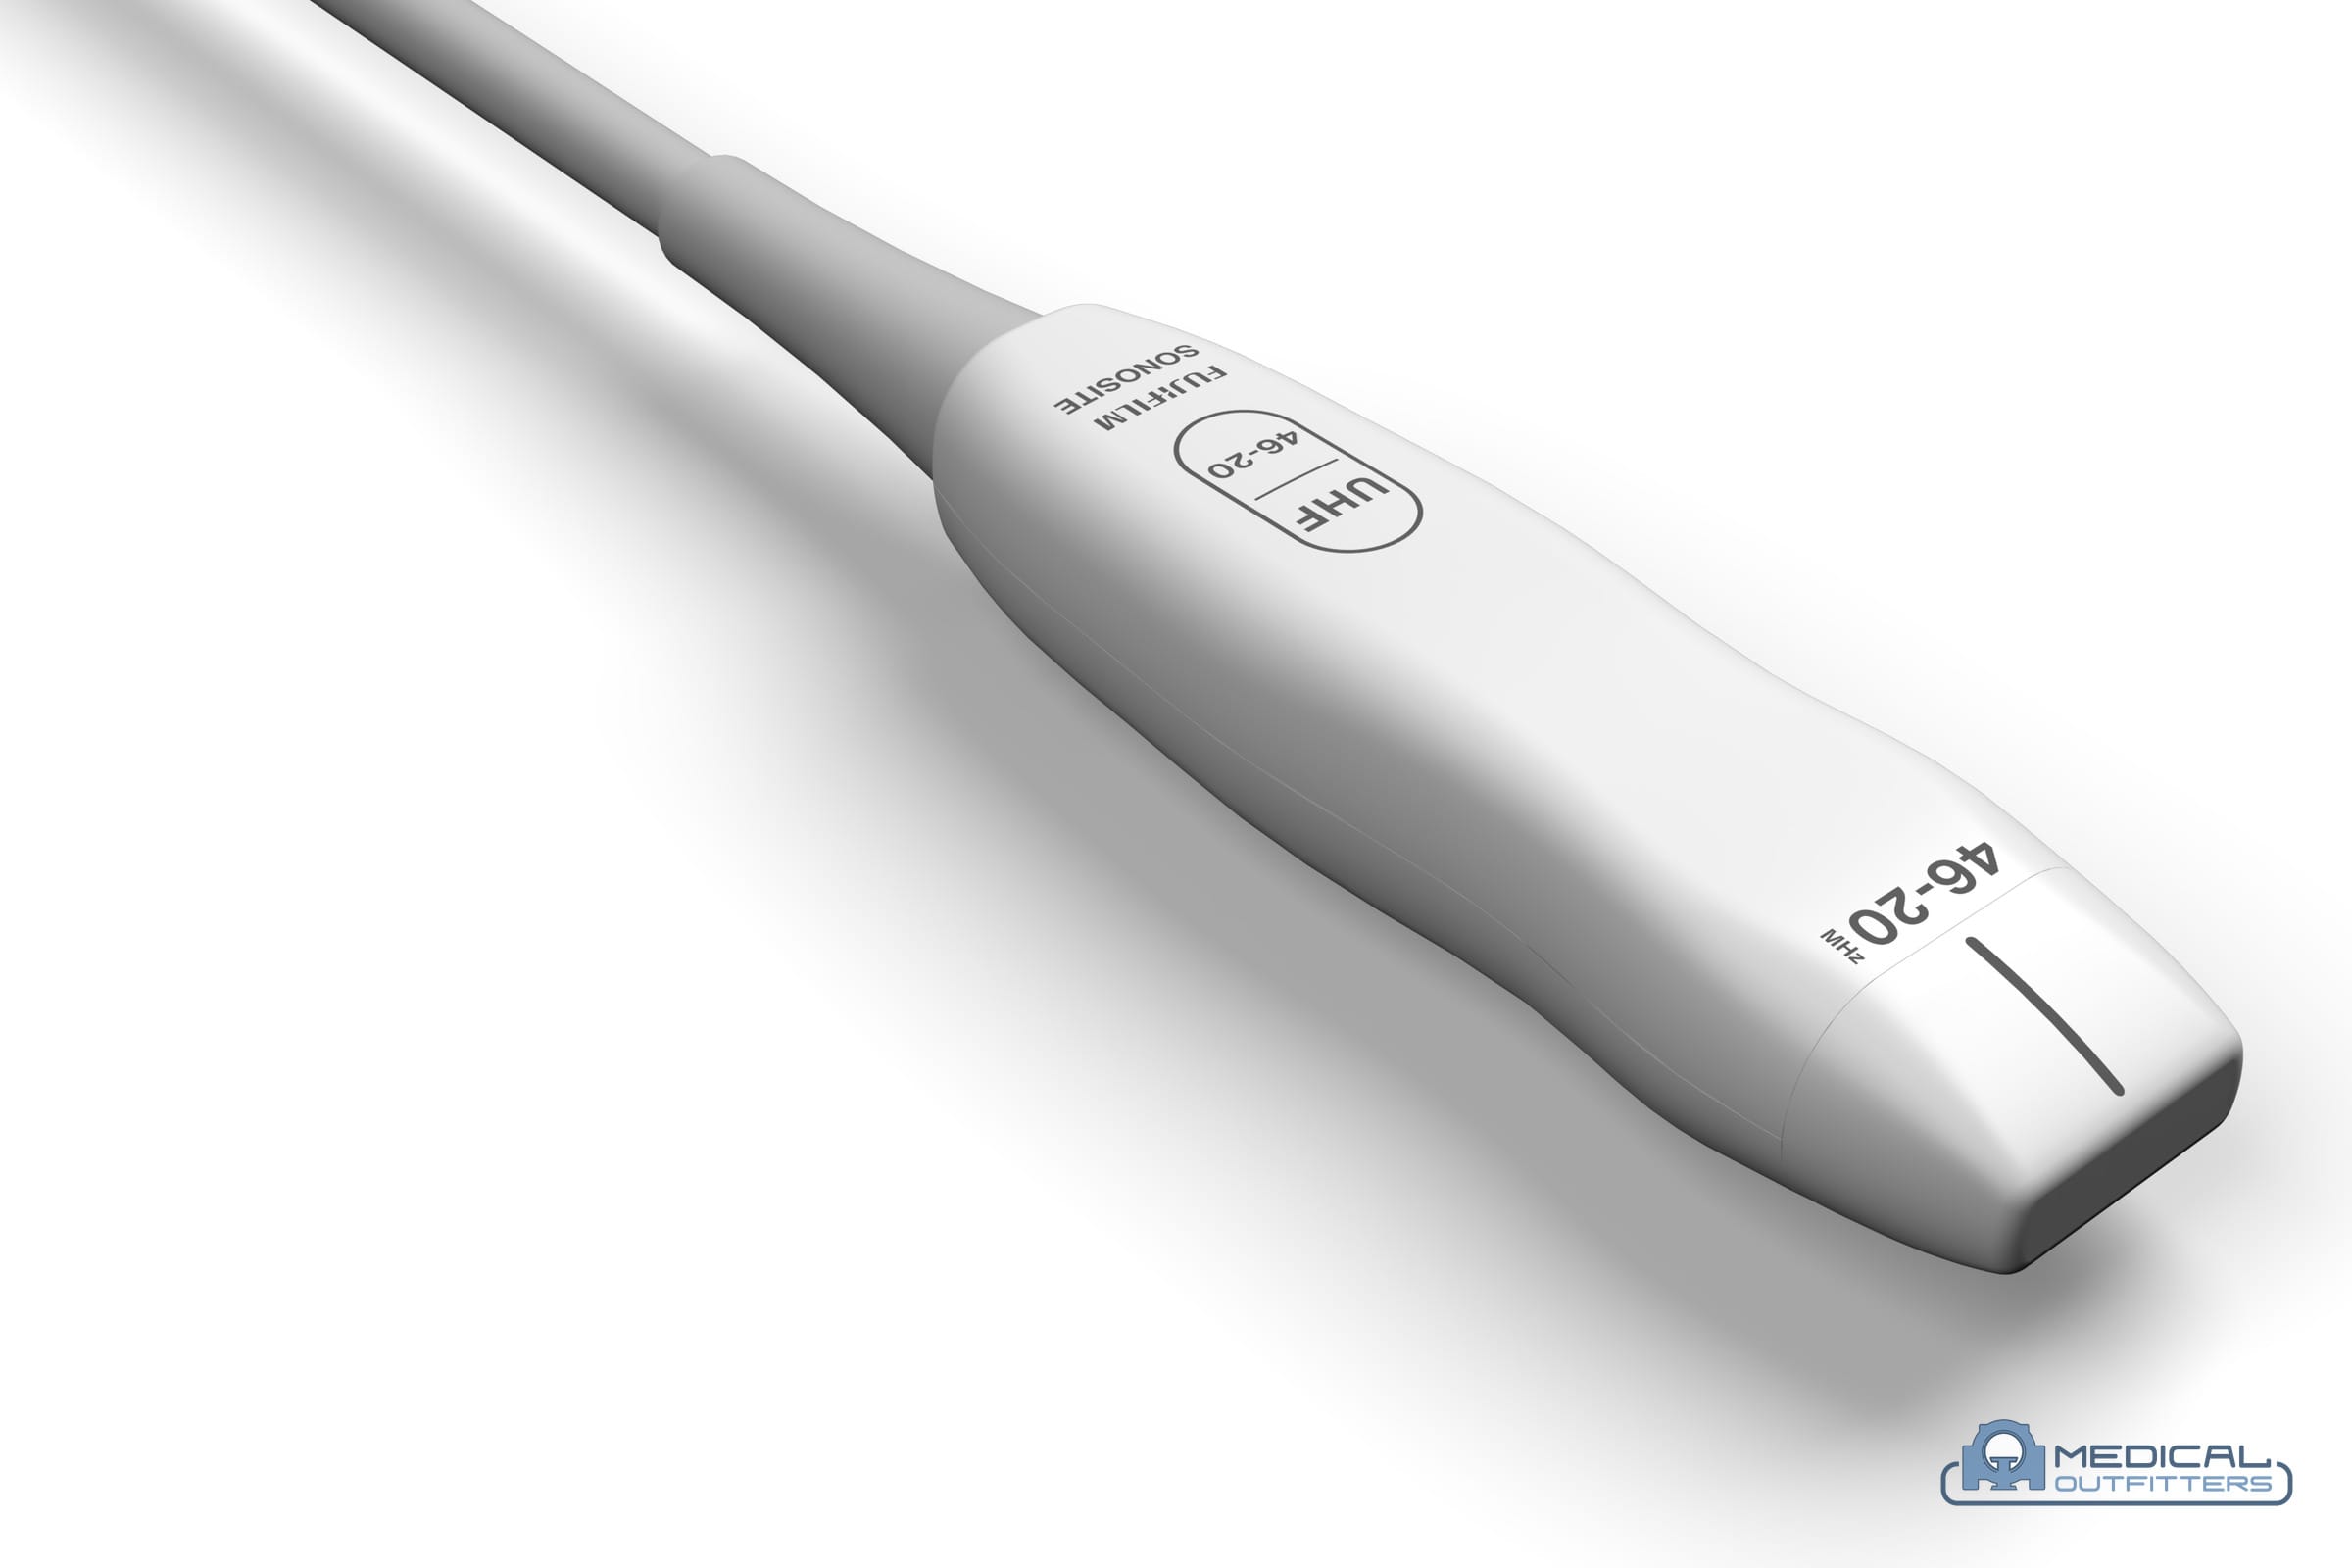
The ultrasound probe is the part of the system that does the imaging, and it is also the part most likely to break. It gets handled hundreds of times a week, wiped with whatever disinfectant is on the cart, dropped onto hard floors and pulled around by its cable. On a lot of systems the probes hanging off the side are collectively worth more than the console they plug into.
This guide covers what is actually inside an ultrasound probe, the types available and what each one is for, the ways they fail, how to test one before you commit money to it, and when a repair is the better decision than a replacement.
What an Ultrasound Probe Actually Is
An ultrasound probe and an ultrasound transducer are, in everyday use, the same thing. Strictly, the transducer is the array of elements that converts energy from one form into another; the probe is the complete handheld assembly built around it. You will see the same object sold as an ultrasound transducer probe, and ultrasound transducers and probes listed as though they were separate categories. They are not. Nobody in a working department makes the distinction, and neither will this guide. One regional note worth knowing when you are reading listings from abroad: across South Asia the scan itself is often called a USG, short for ultrasonography, so the same part is advertised as a USG transducer. It is the same component under a different name.
The physics is straightforward. Apply a voltage across a piezoelectric element and it deforms, pushing a pressure wave into the tissue in front of it. When the echo returns, it squeezes the same element and generates a small voltage back. Every element in the array transmits and listens in turn, thousands of times a second, and the system assembles those timings into an image.
The acoustic stack
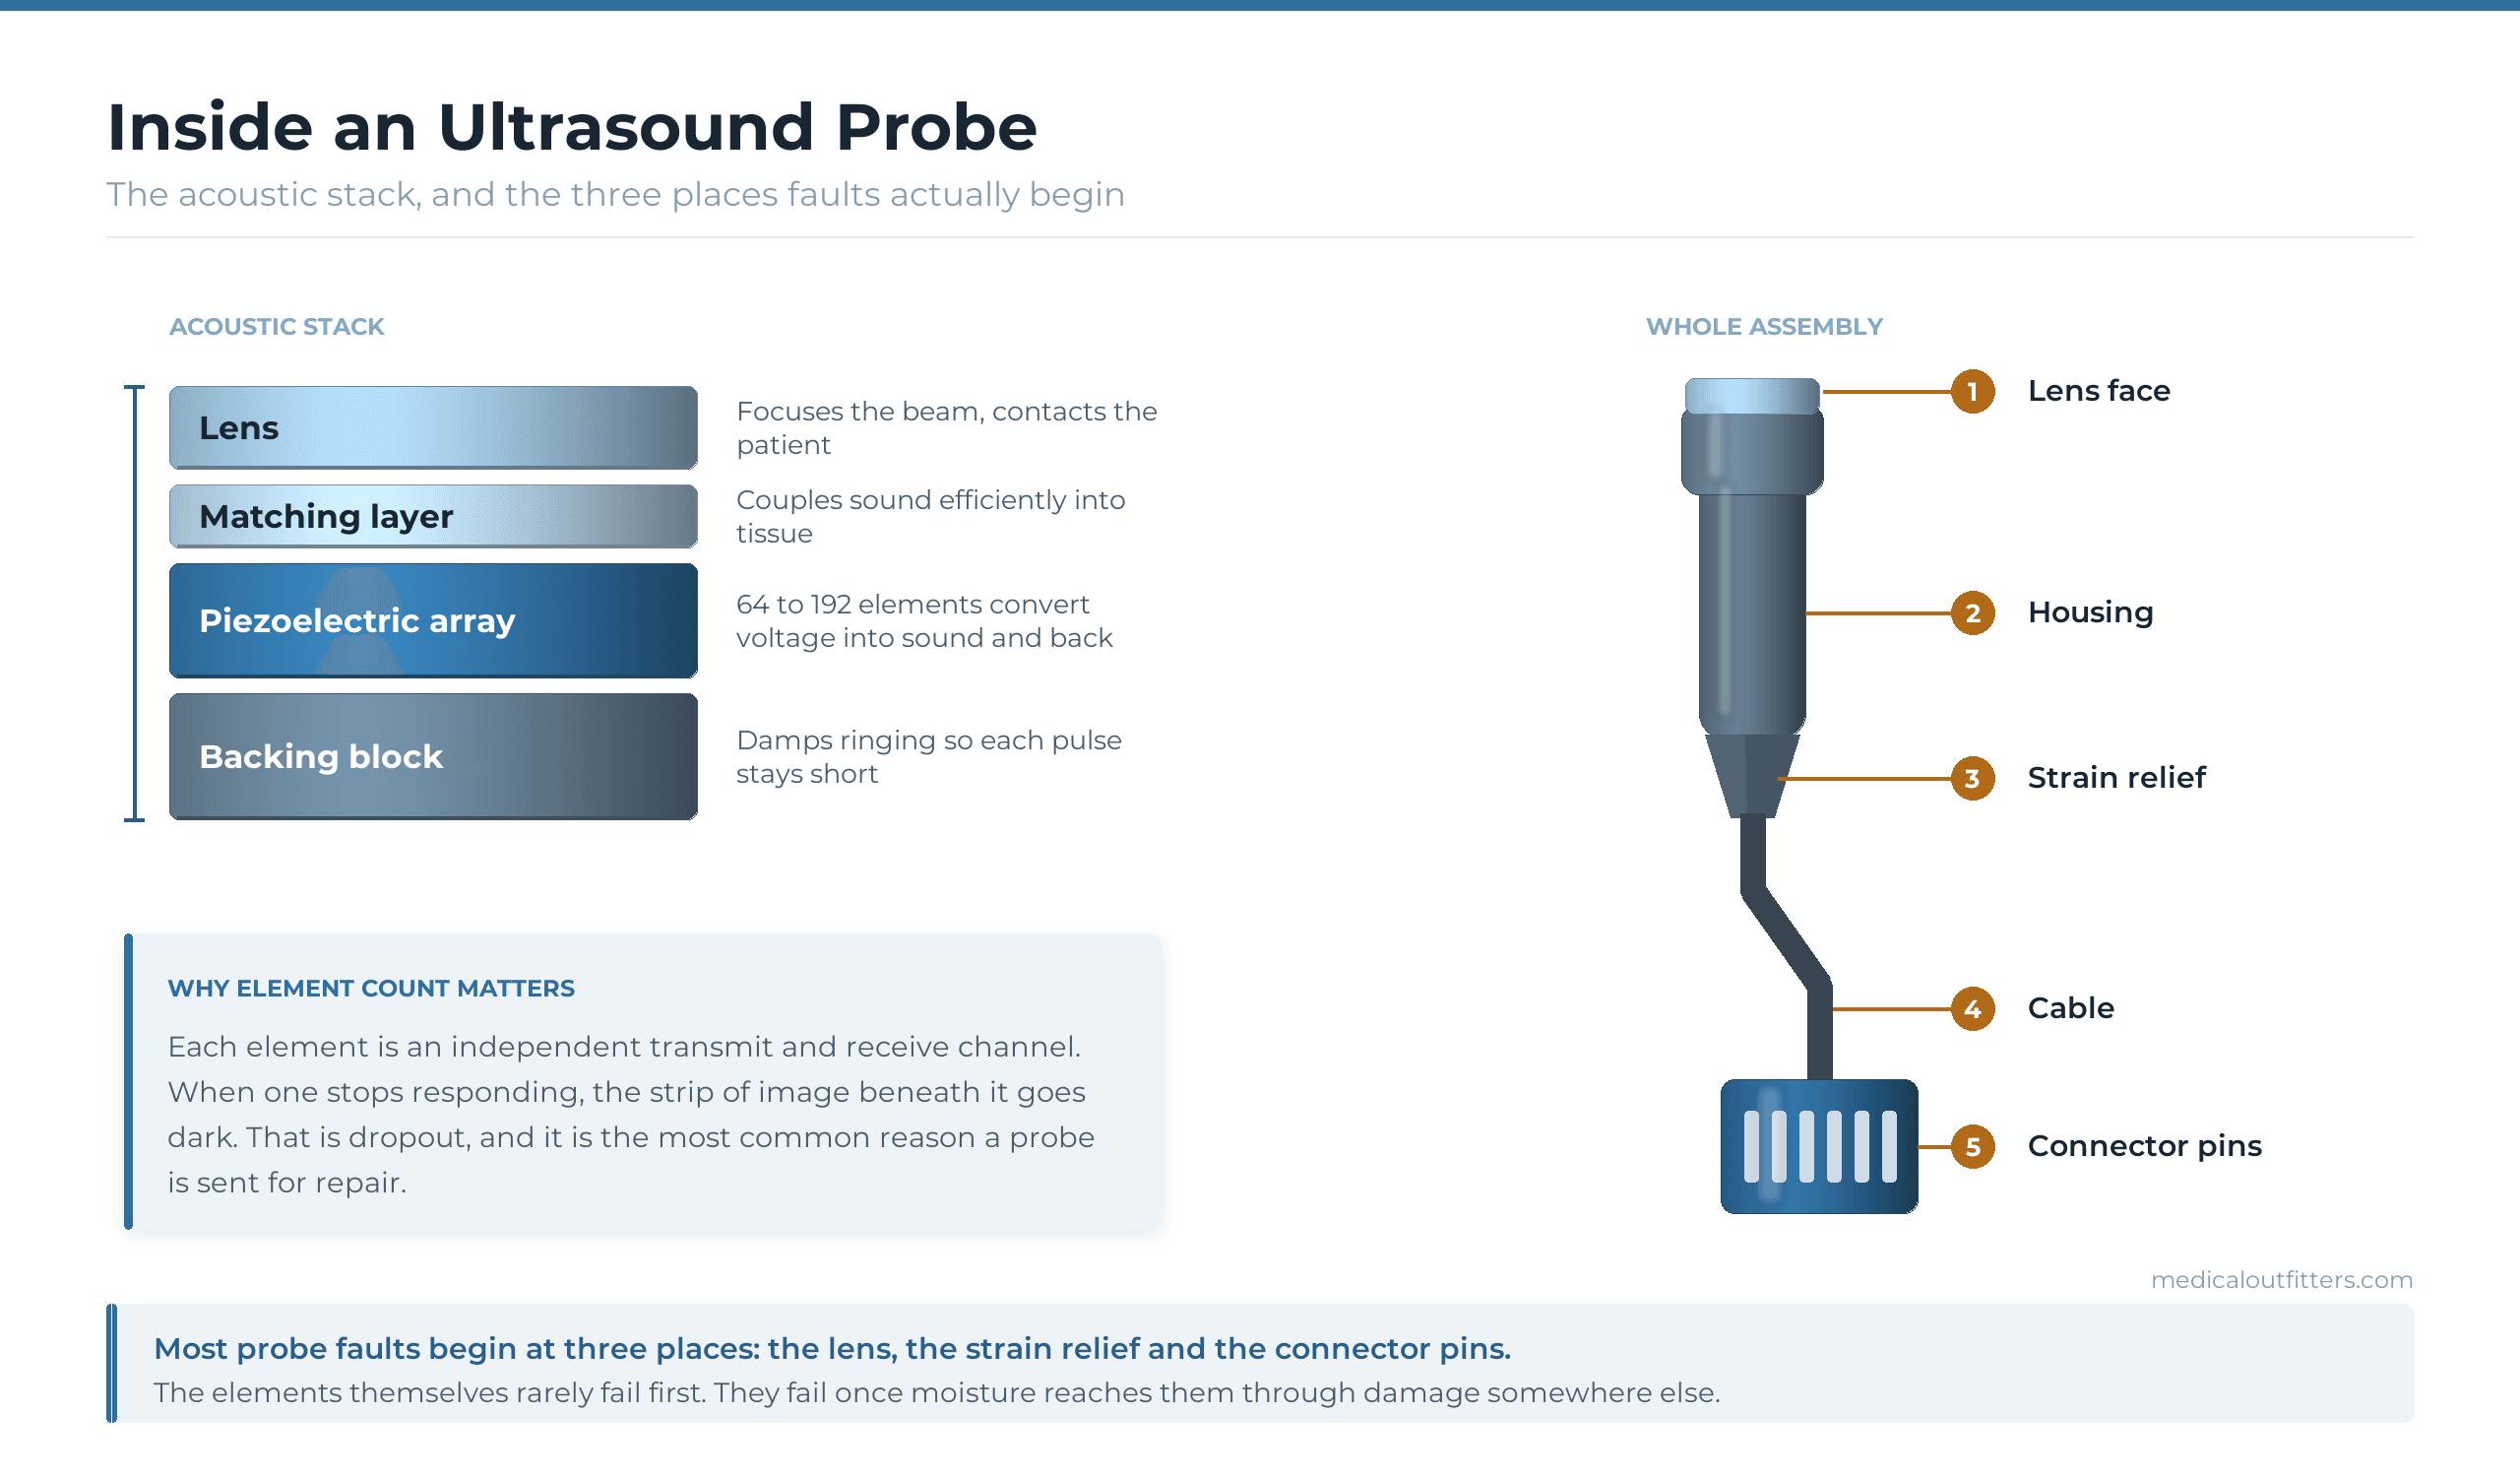
Behind the face of the probe sit four layers that do all the work. The lens touches the patient and focuses the beam. The matching layer below it bridges the acoustic mismatch between the hard element and soft tissue, so the sound crosses over instead of reflecting straight back. The piezoelectric array generates and receives. The backing block behind the array absorbs sound travelling the wrong way and damps the ringing, which is what keeps each pulse short enough to resolve detail.
Why the probe is the expensive part
A modern array holds somewhere between 64 and 256 individual elements, each wired to its own channel through a cable that has to stay flexible for years while carrying dozens of fine conductors. The assembly is precise, largely hand-finished, and sealed against fluid. That is why a single specialist probe can represent a substantial share of what a used system is worth, and why the decision to repair or replace one is worth thinking about rather than defaulting.
The Types of Ultrasound Probes and What Each One Is For
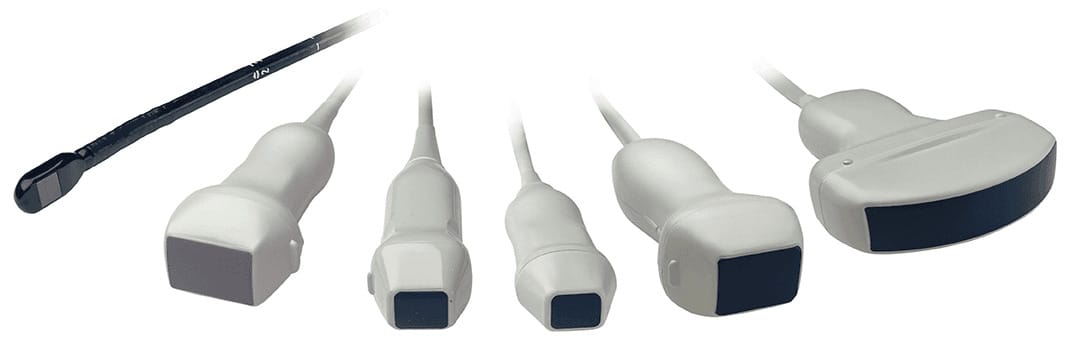
There are far fewer genuinely different ultrasound probes than the catalogues suggest. Almost every ultrasound transducer on the market is a variation of three array geometries, so the types of ultrasound transducer probes you will actually be choosing between come down to these. The shape of the array sets the shape of the image, and the shape of the image is what makes a probe suitable for one examination and useless for another. Two further ultrasound probe types are worth recognising when you are reading a used-equipment listing: the vector array transducer, which fans a trapezoidal field from a small flat face and behaves somewhere between a linear and a phased array, and the older mechanical transducer, which physically sweeps a single element inside the housing instead of steering the beam electronically. Mechanical designs are legacy. Vector arrays are still current on some platforms, but they are tied closely to the systems that support them.
Linear ultrasound probes
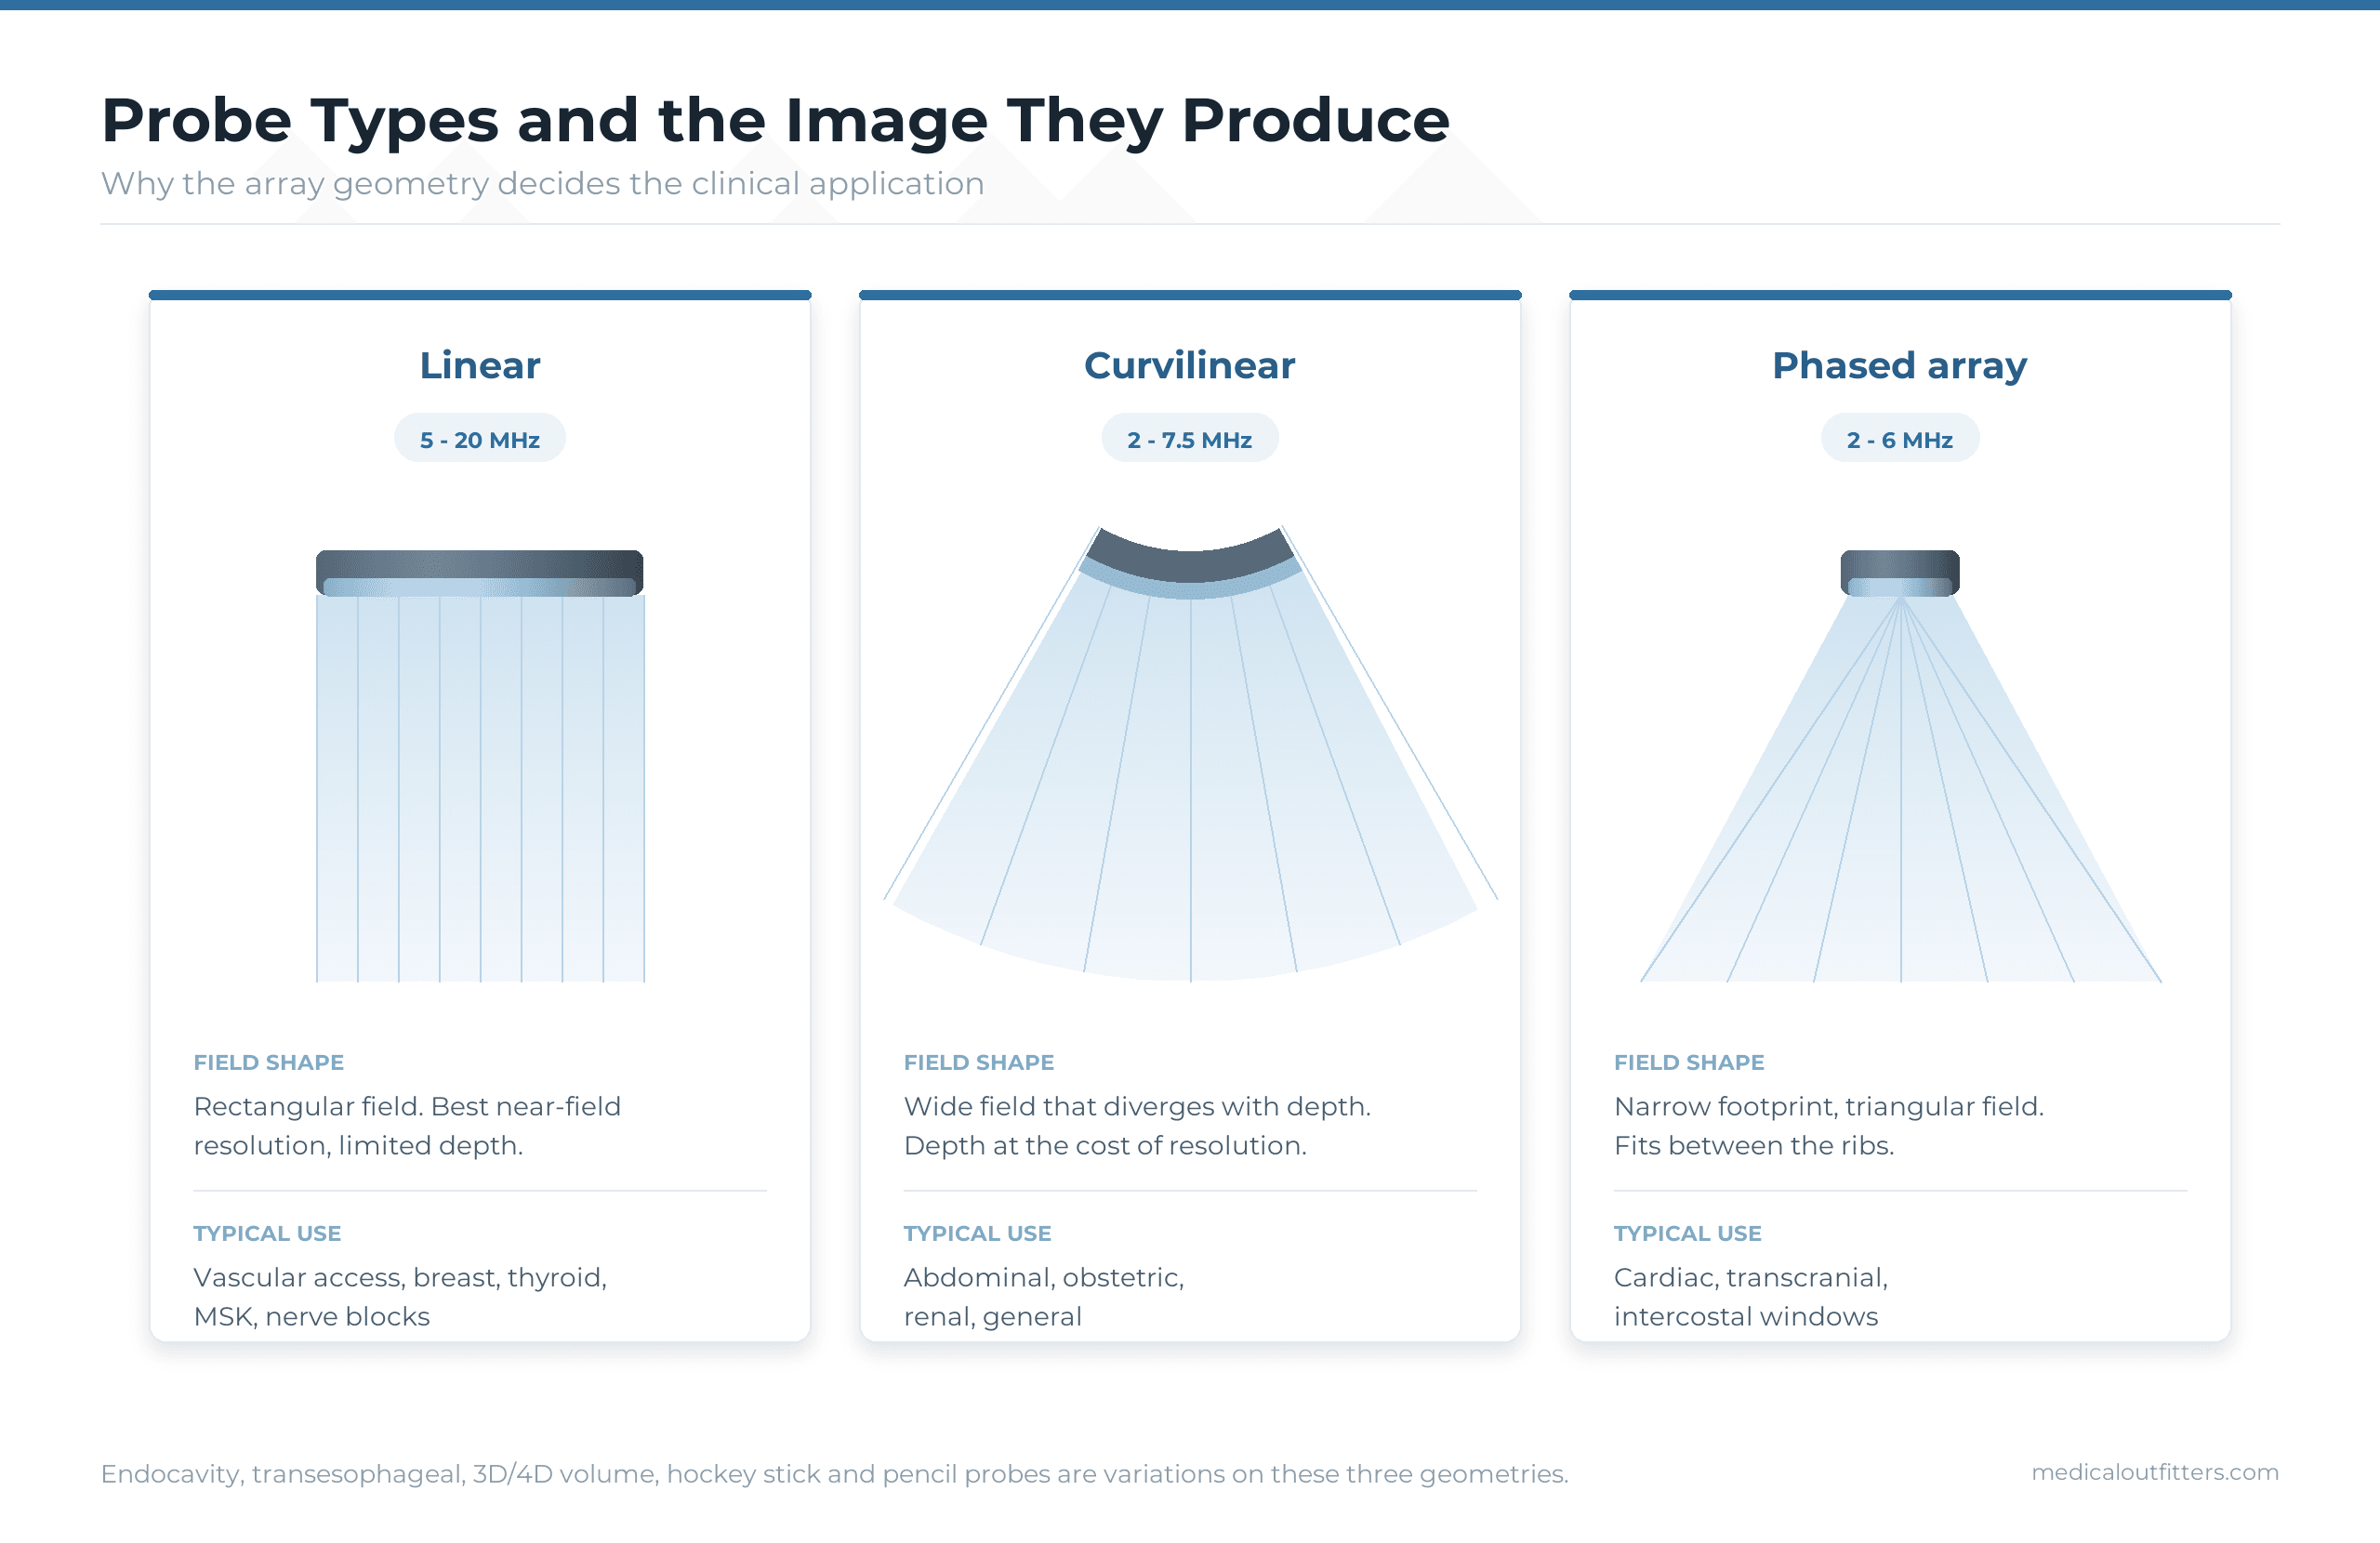
A linear array transducer is a flat array producing a rectangular field. Ultrasound probe frequency is the trade-off that defines it: a linear array runs roughly 5 to 20 MHz, and the higher the ultrasound transducer frequency, the finer the detail and the shallower the reach. High frequency buys excellent resolution close to the surface and costs you penetration, so a linear probe is the right tool for vascular access, breast, thyroid, testes, tendons and peripheral nerve blocks, and the wrong one for anything deep. This is often the probe in most constant use in a busy department, and one of the most likely to come back damaged.
Curvilinear probes
Also called convex probes. The array of a curvilinear transducer is curved, so the beam diverges with depth and gives a wide field of view from a smaller contact area, typically at 2 to 7.5 MHz. This is the general abdominal and obstetric workhorse. You trade near-field resolution for the depth needed to reach the liver, kidneys or a gravid uterus.
Drag to turn the transducer over. The curved face is what produces the diverging field shown below.
Phased array probes
A phased array transducer packs its elements tightly together behind a small footprint and steers the beam electronically into a triangular sector at 2 to 6 MHz. The narrow face is the entire point: it fits in the space between two ribs. Cardiac and transcranial imaging both depend on it, and the near-field resolution is deliberately sacrificed to get there. A phased array ultrasound probe is also what sits at the tip of a TEE, which is why the two share most of their failure modes.
Specialty probes
Endocavity probes are curved arrays on a long shaft for transvaginal and transrectal work. Transesophageal probes, usually shortened to TEE, put a phased array on a steerable gastroscope to image the heart from behind. 3D and 4D volume probes either sweep a conventional array mechanically inside the housing or use a full matrix of elements. Pencil probes do continuous-wave Doppler with no image at all, and the hockey stick ultrasound probe is a small linear array on a right-angled head for intraoperative and small-parts work. A standalone Doppler transducer of that pencil type is an obstetric and vascular accessory rather than an imaging probe. Endocavity work also needs single-use transducer covers, and reusing them, or fitting a type the manufacturer has not approved, risks both cross-contamination and lens damage.
One point that catches people out when buying: probes are not generally interchangeable between systems. The connector, the channel count and the software licence all have to match. A probe from the same manufacturer but a different generation will often physically connect and still not be recognised. Always confirm compatibility against the exact system model and software version before buying.
How Ultrasound Probes Fail
An ultrasound transducer rarely fails all at once. Ultrasound probe damage is almost always cumulative: they degrade, and the image degrades with them, usually slowly enough that the people using it every day stop noticing. These are the faults worth training staff to spot.
Element dropout
Ultrasound probe dropout is the most consequential fault, although published surveys of probes in clinical use find lens delamination and cable breaks more often. When one element stops responding, the strip of image directly beneath it goes dark. It starts as a faint vertical line that is more irritating than dangerous, and it spreads. The reason it matters clinically is simple: a black band is not an empty band. Anything sitting in that column of tissue, including something you needed to find, is not going to be displayed.
Lens damage and delamination
The lens takes hairline cracks from impact and from repeated exposure to the wrong chemistry. Alcohol-based cleaners used on probes that are not rated for them are a common culprit, drying the lens material until it crazes. Separately, the bond holding the lens to the stack can begin to release, which shows up as patchy bright and dark areas rather than clean lines. A cracked lens is also an infection control problem, because a crack harbours organisms that no surface wipe will reliably reach.
Strain relief and cable damage
The strain relief is the tapered collar where the cable leaves the handle. It is handled more than any other part of the probe and it is where cables get yanked, so it splits. Once the sheath is open the conductors inside are exposed to gel, fluid and flexing, and deterioration accelerates quickly. Cable faults also appear mid-run, where the probe has been rolled over by a machine wheel or trapped in a rail.
Fluid ingress is a common route to secondary faults.
Elements very seldom fail on their own. When they do fail, a common route is gel or disinfectant finding a way in through a cracked lens, a split strain relief or a damaged connector. This is why small physical damage should be dealt with straight away rather than watched.
Connector pin damage
The connector is the least respected part of the assembly. Pins get bent when a probe is inserted at an angle, and the housing cracks when a probe is dropped from the port. Bent pins produce intermittent faults that look exactly like array problems, which is why anybody diagnosing a probe should look at the connector before condemning the head.
How to Test a Probe Before You Spend Anything
A surprising number of probes are replaced without ever being properly tested, and a surprising number of “faulty” probes turn out to have a bent connector pin or a system setting problem. Fifteen minutes of structured checking is worth doing every time.
Start with a careful visual inspection under good light. Run a fingertip over the lens looking for lifted edges and check it at an angle for crazing. Flex the strain relief and watch for splits opening. Run the whole cable through your hands. Inspect every connector pin for bending, corrosion and residue.
Then do an air scan. With the probe held in free air and the gain turned well up, the display should show even noise across the full width of the sector. Dead elements appear as dark vertical bands that stay in the same place on the image when you move the probe. Repeat with a phantom or a container of water if you have one, which will reveal subtler problems that the air test misses.
Finally, swap the probe into a different port and, if you can, a different system of the same model. If the fault moves with the probe it is the probe. If it stays with the port it is the system, and you have just saved yourself the cost of a probe.
Photograph the fault before you send anything anywhere.
A saved image showing dropout bands, alongside photographs of the lens, strain relief and connector, gives a repair provider what they need to quote accurately and gives you evidence if a probe is returned no-fault-found.
Ultrasound Probe Repair or Replacement?
An ultrasound probe repair at a specialist depot is normally a fraction of the cost of a new probe from the manufacturer, and well below the cost of a good used one for the specialist types. That gap is wide enough that repair deserves to be the first question rather than the last resort, particularly for TEE, 3D and 4D probes where replacement figures are highest.
What a repair can usually fix
Cable and strain relief replacement, connector rebuilds and pin replacement, housing repairs, lens replacement and re-bonding, and in many cases replacement of failed elements within the array. Cable harness repair in particular is common, well understood and considerably cheaper than a new probe, because the expensive acoustic assembly is untouched. A properly repaired probe should come back with a test report showing full element function and a passed electrical safety test, and should carry a warranty. If a provider will not supply the test report, that tells you something.
What usually is not worth repairing
Widespread element failure across the array, severe fluid damage that has reached the interconnect, and delamination across most of the lens face. At that point the acoustic assembly is effectively the probe, and rebuilding it approaches the cost of replacing it. TEE probe repair and 3D/4D probe repair are their own categories and are quoted separately, because both carry mechanical or sealing complexity a standard array does not. The other case for replacing rather than repairing is age: if the system it belongs to is itself close to retirement, spending on the probe is spending on a dead end.
For a probe that is simply worn out on an otherwise healthy system, a good used or refurbished replacement often lands between the two options. What matters there is that the probe has been tested and reported on, not just visually inspected and cleaned.
- Dropout on one or two elements Test first, then repair; usually economic
- Split strain relief or damaged cable Repair; the acoustic assembly is intact
- Bent or corroded connector pins Repair, and check the port that caused it
- Cracked lens, array otherwise sound Repair, and act quickly before fluid gets in
- Dropout across much of the array Replace; the rebuild approaches replacement cost
- Fluid damage reaching the electronics Replace, and find out how the fluid got in
Care, Cleaning and Storage That Actually Extends Probe Life
Many transducer failures that reach a repair depot began as something preventable. Three habits do most of the work.
Clean to the manufacturer’s instructions, not to local custom. Ultrasound probe disinfection is not a place for improvisation: every probe has a published list of compatible disinfectants and a stated contact time, and an ultrasound probe cleaner that is not on that list will do cumulative damage, and the AIUM official statements are the reference worth keeping to hand for transducer care, and the FDA guidance on reprocessing reusable medical devices sets the framework those instructions are written against. Products outside that list, particularly alcohol-based wipes used on lens materials that cannot tolerate them, cause cumulative damage that only becomes visible months later. Wipe gel off immediately after each examination rather than leaving it to dry, and never immerse a probe beyond the depth the manufacturer specifies.
Ultrasound probe orientation and handling
Every probe carries an orientation marker: a ridge, dot or groove on one side of the head that corresponds to a marker on one side of the screen. Getting ultrasound probe orientation wrong does not damage anything, but it reverses left and right in the image, and it is a common reason a trainee cannot find a structure they are looking straight at.
How to hold an ultrasound probe matters for the equipment as much as the image. Held like a pen, close to the head, with the side of the hand resting on the patient, the probe is stable and the cable is not taking any load. Held like a torch, at the base with the cable dangling, every small movement is transmitted straight into the strain relief.
Manage the cable. Cables should not be wrapped tightly around the probe, left trailing across floors, or used to pull a probe out of its holder. Most strain relief damage is the accumulated result of small pulls, not one dramatic incident.
Store probes in their holders, every time. An ultrasound probe holder is the cheapest insurance on the machine. A probe resting on a keyboard or hanging by its cable is a dropped probe waiting to happen, and a drop onto a hard floor is one of the most expensive things that routinely happens to one. Where a system is moved between rooms, probes should be secured before the machine moves.
Building a short probe inspection into your regular quality assurance schedule is worth more than any of this. Catching a hairline lens crack in a monthly check is a cheap repair. Finding it six months later, after fluid has reached the array, is a replacement.
Frequently Asked Questions
What is an ultrasound probe?
An ultrasound probe is the handheld device that both transmits sound into the body and receives the returning echoes. It contains an array of piezoelectric elements that convert electrical energy into sound and back again, along with a lens, a matching layer and a backing block that shape and damp the beam. The terms probe and transducer are used interchangeably.
What is the difference between an ultrasound probe and a transducer?
In practice there is none. Technically the transducer is the element array that converts energy between electrical and acoustic form, while the probe is the whole assembly that houses it, including the lens, cable and connector. Manufacturers and clinicians use both words for the same object.
What are the main types of ultrasound probes?
There are three core geometries: linear, which gives a rectangular field at 5 to 20 MHz for vascular, breast and musculoskeletal work; curvilinear or convex, which gives a wide diverging field at 2 to 7.5 MHz for abdominal and obstetric imaging; and phased array, which gives a triangular sector at 2 to 6 MHz from a small footprint for cardiac and transcranial imaging. Endocavity, transesophageal, 3D and 4D volume, pencil and hockey stick probes are variations on those three.
How do I know if my ultrasound probe is damaged?
The usual signs are dark vertical bands in the image that stay in the same place as you move the probe, which indicates element dropout; patchy bright and dark areas, which suggests the lens is delaminating; visible cracks in the lens or housing; a split in the strain relief where the cable leaves the handle; and intermittent imaging that changes when the connector is moved. An air scan at high gain will reveal dropout quickly.
Can a broken ultrasound probe be repaired?
In most cases yes. Cable and strain relief replacement, connector and pin repair, housing repairs, lens replacement and limited element replacement are all routine, and cost a fraction of a new probe. Repair stops being economic when element failure is widespread across the array, when fluid has reached the interconnect, or when the lens has delaminated across most of its face.
How long does an ultrasound probe last?
There is no fixed lifespan. A probe in light use that is cleaned correctly and stored properly can run for many years, while a probe in a busy department that is dropped once can fail the same week. Handling and cleaning practice determine probe life far more than age or scan hours do.
Are ultrasound probes interchangeable between machines?
Generally no. The connector type, channel count and software licensing all have to match the host system. Probes from the same manufacturer but a different system generation will often physically fit and still not be recognised. Always confirm compatibility against the exact model and software version before purchasing.
How should ultrasound probes be cleaned?
Follow the probe manufacturer’s published instructions for use, which list the approved disinfectants and the required contact time for that specific probe. Remove gel immediately after each examination, avoid any product not on the approved list, take particular care with alcohol-based wipes on lens materials that cannot tolerate them, and never immerse a probe past the depth the manufacturer permits.
Where to Go From Here
If you are weighing a probe fault, test it before you replace it and photograph what you find. If you are buying, confirm compatibility against the exact system model and insist on a test report rather than a description of condition.
Medical Outfitters supplies new and refurbished ultrasound systems across the United States, Puerto Rico and the Caribbean, and our service and repairs team can advise on probe faults and sourcing. If you are still deciding on a system, the ultrasound machine cost and buying guide covers what drives price across the current range. Two companion explainers go deeper: ultrasound transducer types explained sets out every probe type with its frequency, footprint and exams, and how to choose an ultrasound probe turns that into a decision for your caseload.
Related Articles